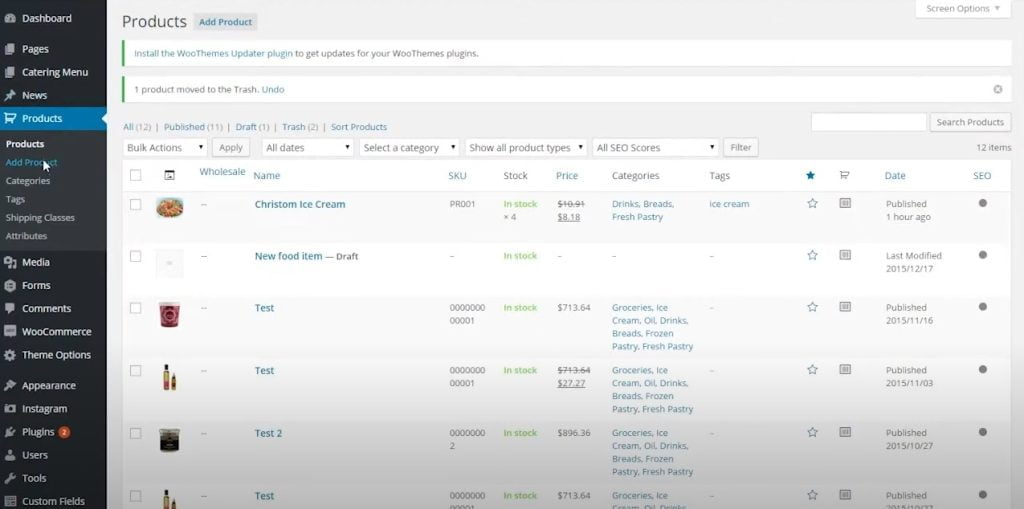
1. To create a variable product in WooCommerce, go to Products and then Add product.
2. Enter the Name of the product. We’ll call it Ice Cream with Options in this example. Write a long description of the product after that.

3. Next to Product Data, select Variable product. If you want to learn more about the different product types, we recommend watching this video.

4. Every product requires a SKU—a unique product code or ID. For this example, enter ICE001 and then, choose the Tax Status and Tax Class

5. You don’t need to use inventory if you have an unlimited supply of the product. Select Manage stock and then enter the stock quantities if you only have a limited amount.

6. Following that is Shipping. To prepare for weight-based shipping and other shipping options, you need to add weight and size of the product. Then you can include cross-sells and upsells.

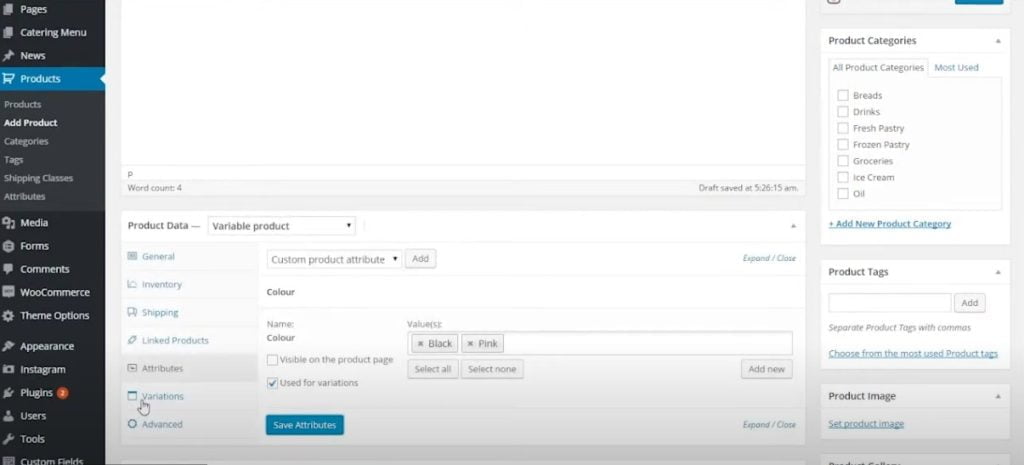
7. After that, the Attributes necessary for variations must be added. A couple of examples are size and colour. You also have the option to select every attribute or not. Check out this video if you want to learn more about attributes.

8. Tick Used for variations after that. You may also tick Visible on the product page if you want it visible, and then click Save Attributes.

9. The next step is to go to Variations. Click Go to add a variation from which you can choose.
10. Two variations are required for this example. To add another variation and select a new colour, click Go once again.
11. When you click the down arrow, you’ll see a few options. Each variation is capable of having its own price, SKU, weight, tax class, and stock management. It can also be Virtual and Downloadable. All of these are optional, but you must still include a Price for each variation you have selected. Once you’ve set the variations, don’t forget to click Save Changes.

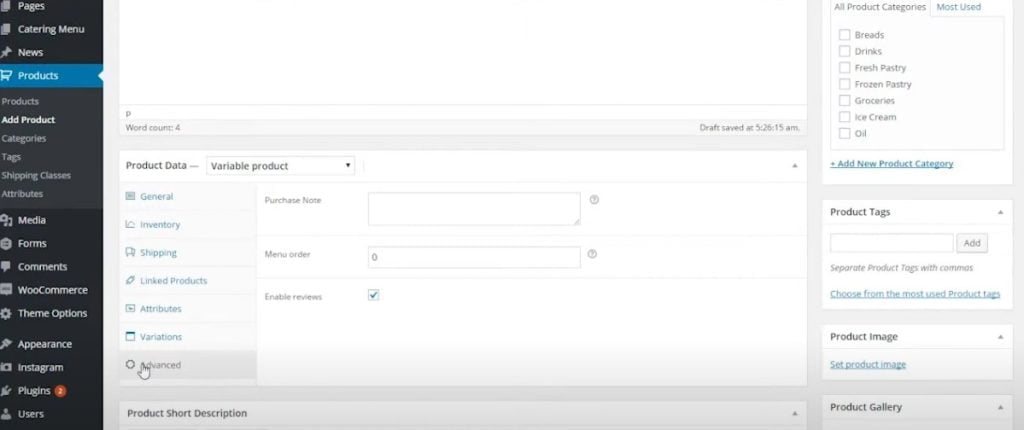
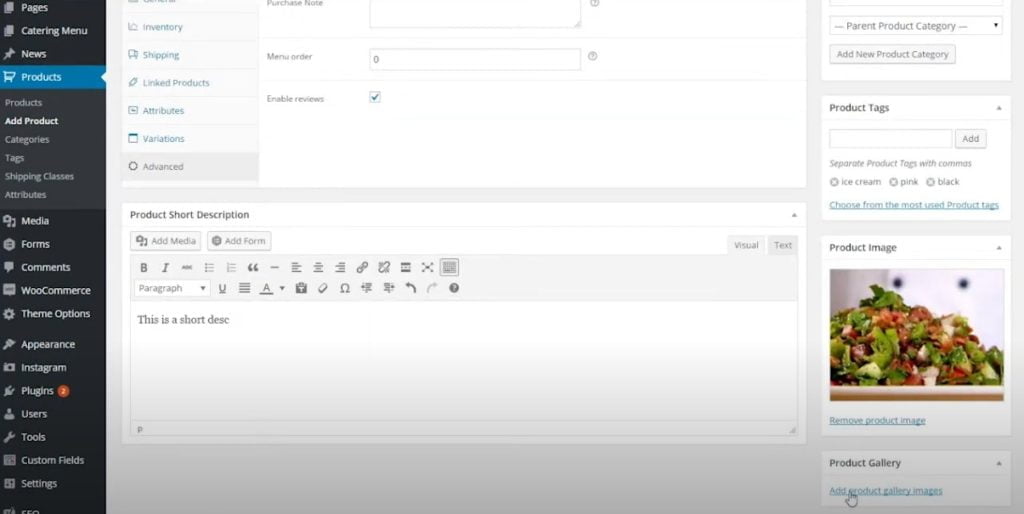
12. After doing that, go to Advance. You can include a Purchase Note here. The user will see this message after making a purchase. You can choose the Menu Order to change the position on the product listing page and enable or deactivate reviews by checking the appropriate box.
13. Next is the Product short description. Depending on your theme, this may appear under the price on the summary or listing page, or it may not appear at all.

14. On the right side of the screen, you’ll see the Product Categories. The product may be added to as many categories as you like. You can also create new categories by selecting Add New Product Category. This is also managed in the Products Categories section on the left side of the page.

15. Then there are Product Tags. Depending on the theme, this may or may not appear.

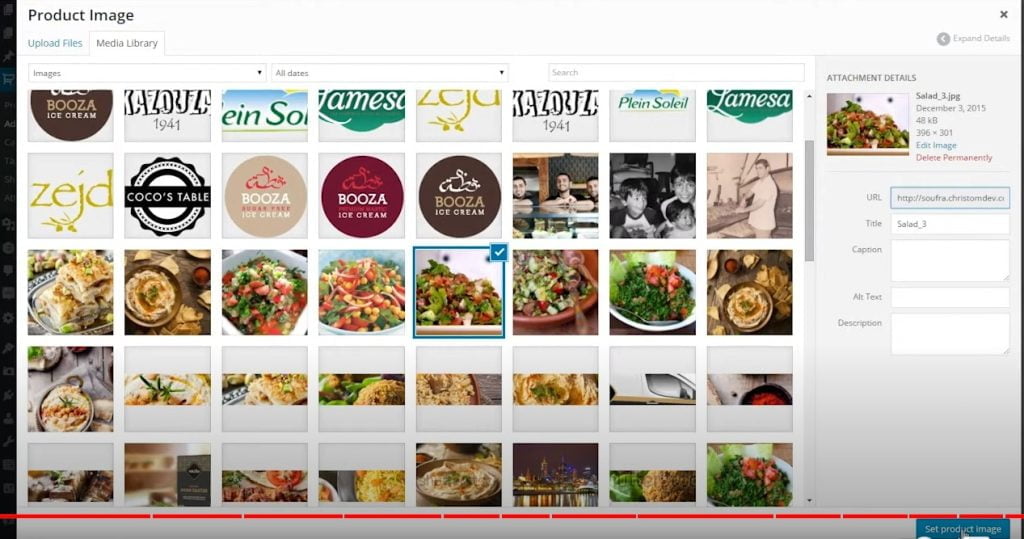
16. The Product Image comes next. Set this by clicking the Set product image button. This is the main image that will appear on the product description page and as a thumbnail on the listing or summary page.

17. Let’s add one image for the purpose of this tutorial. To do this, click Set product image after selecting the image you want.
18. Next is the Product Gallery. These are the thumbnails that appear below the main image on the product details page. More than one image may be added here. To add more images to the product gallery, click Add product gallery images, then choose several images by holding down the Control key, or upload new ones.
19. After you’ve uploaded and selected your images, click Add to gallery.

20. When all the content has been added, click Publish to publish the product. The product is now ready for the user to make some purchases.

